
Get started with PrestaShop
From downloading the plugin to requesting your first test payment, learn how to get started with the Checkout.com for PrestaShop plugin.
This guide assumes that you have already installed PrestaShop.
Before you start
Create a test account
If you haven't already, create a test Checkout.com account.
Get your API keys
In order to set up the PrestaShop plugin, you'll need two API keys: one secret and another public, both of which are generated automatically when you create your account.
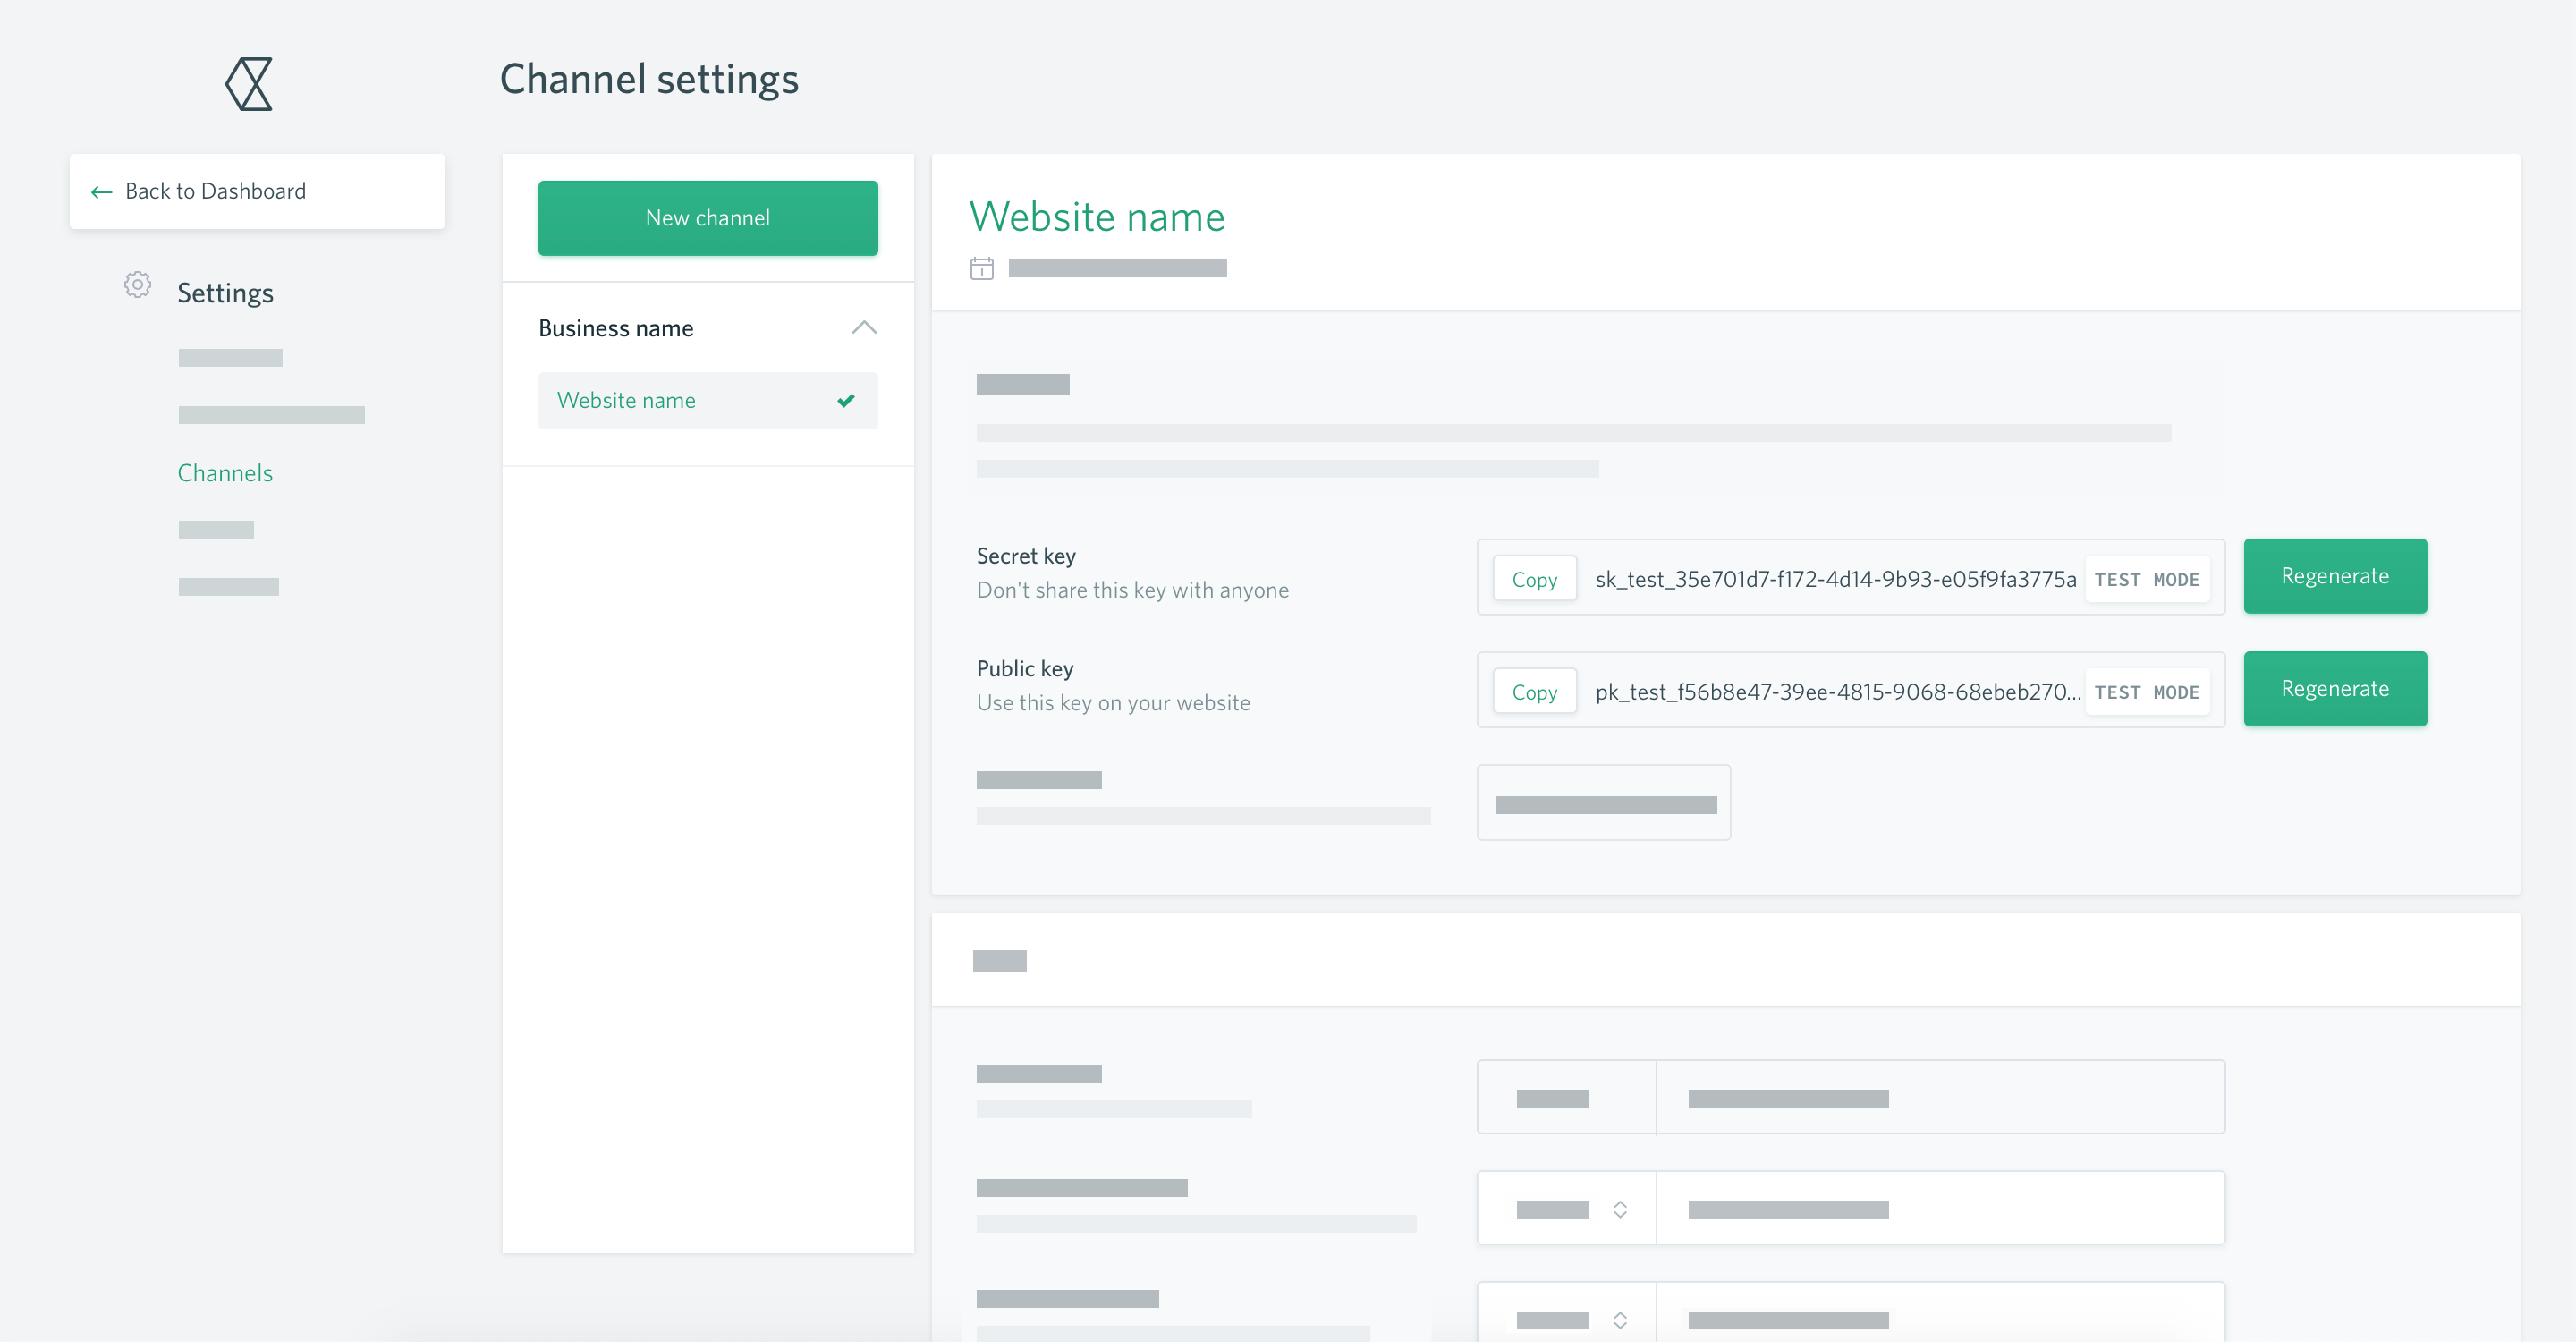
Log in to your test account on the Hub sandbox.
In the left menu, go to Settings > Channels, and make a note of your secret and public API keys.
Configure webhooks
You also need to configure webhooks for PrestaShop. Correctly configuring them is important; if your webhooks are incorrectly formatted, the plugin will not work.
Webhooks are notifications that we send when an event occurs on your account. For example, when a payment is captured. These are used by the PrestaShop plugin to update the status of an order. Read more about webhooks.
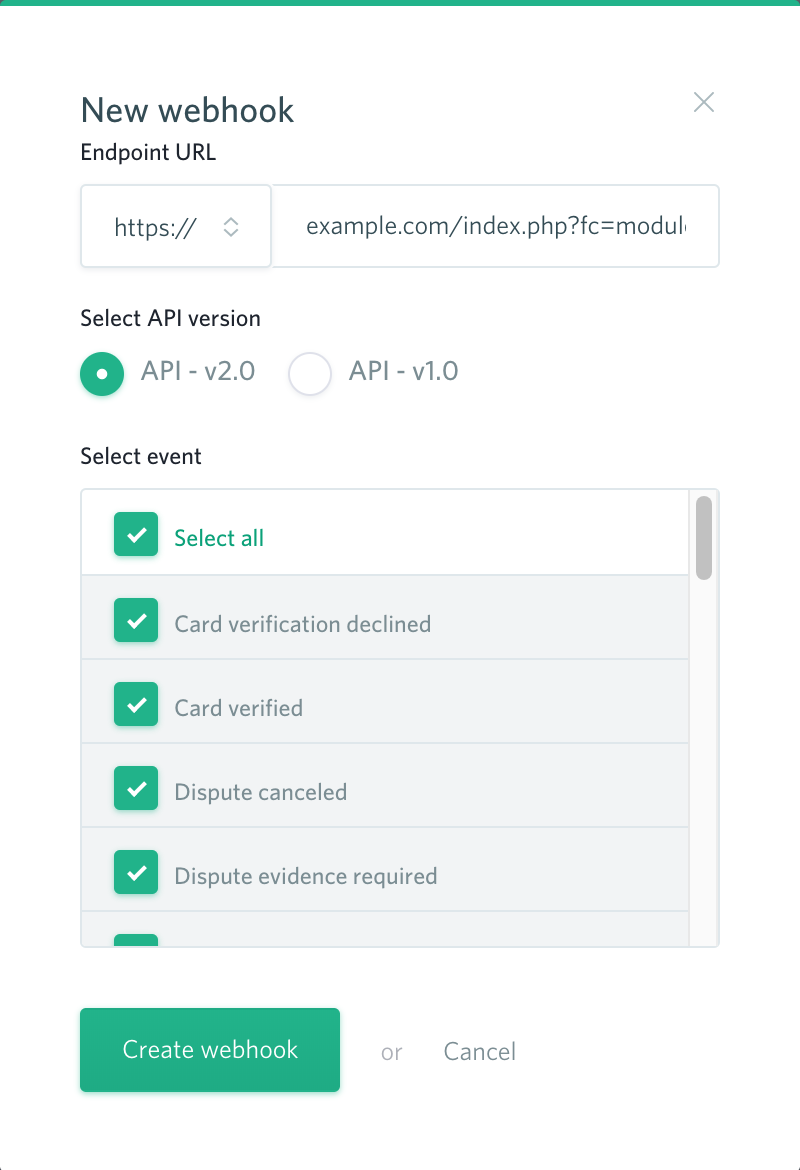
While in the Settings > Channels section of your Hub account, scroll down to the Webhooks section and click New webhook.
Enter the following endpoint URL, replacing
example.comwith the URL of your shop:
example.com/index.php?fc=module&module=checkoutcom&controller=webhook.- Select API - v2.0.
- Tick Select all, then click Create webhook.
Installing the Checkout.com for PrestaShop plugin
There are two ways to install the plugin:
Using PrestaShop Module Manager
If you use this method, please contact our support team at [email protected] so we can provide you with the proper .zip file.
- Once you've received the .zip file from us, log in to your PrestaShop admin dashboard and go to Modules > Module Manager.
- Click Upload a module, and drop your .zip file into the window that pops up.
- If successful, you'll get a 'Module installed!' message.
- Click Configure to start setting up the plugin.
Using Composer
- Download the plugin from GitHub.
- Unzip the folder.
- Upload the contents to your PrestaShop root directory, specifically
[root directory]/modules/checkoutcom. - Run the command
composer install --no-devinside the[root directory]/modules/checkoutcomfolder. - Log in to your PrestaShop admin dashboard and go to Modules > Module Manager.
- Search for 'checkout' and the plugin should appear in the results. Click Configure to start setting up the plugin.
You're now ready to configure the PrestaShop plugin.
Configure the Checkout.com for PrestaShop plugin
Log in to your PrestaShop admin dashboard, go to Modules > Module Manager and find the Checkout.com plugin.
- Click Configure.
- Select the Environment you want. Select Sandbox if you want to start testing payments.
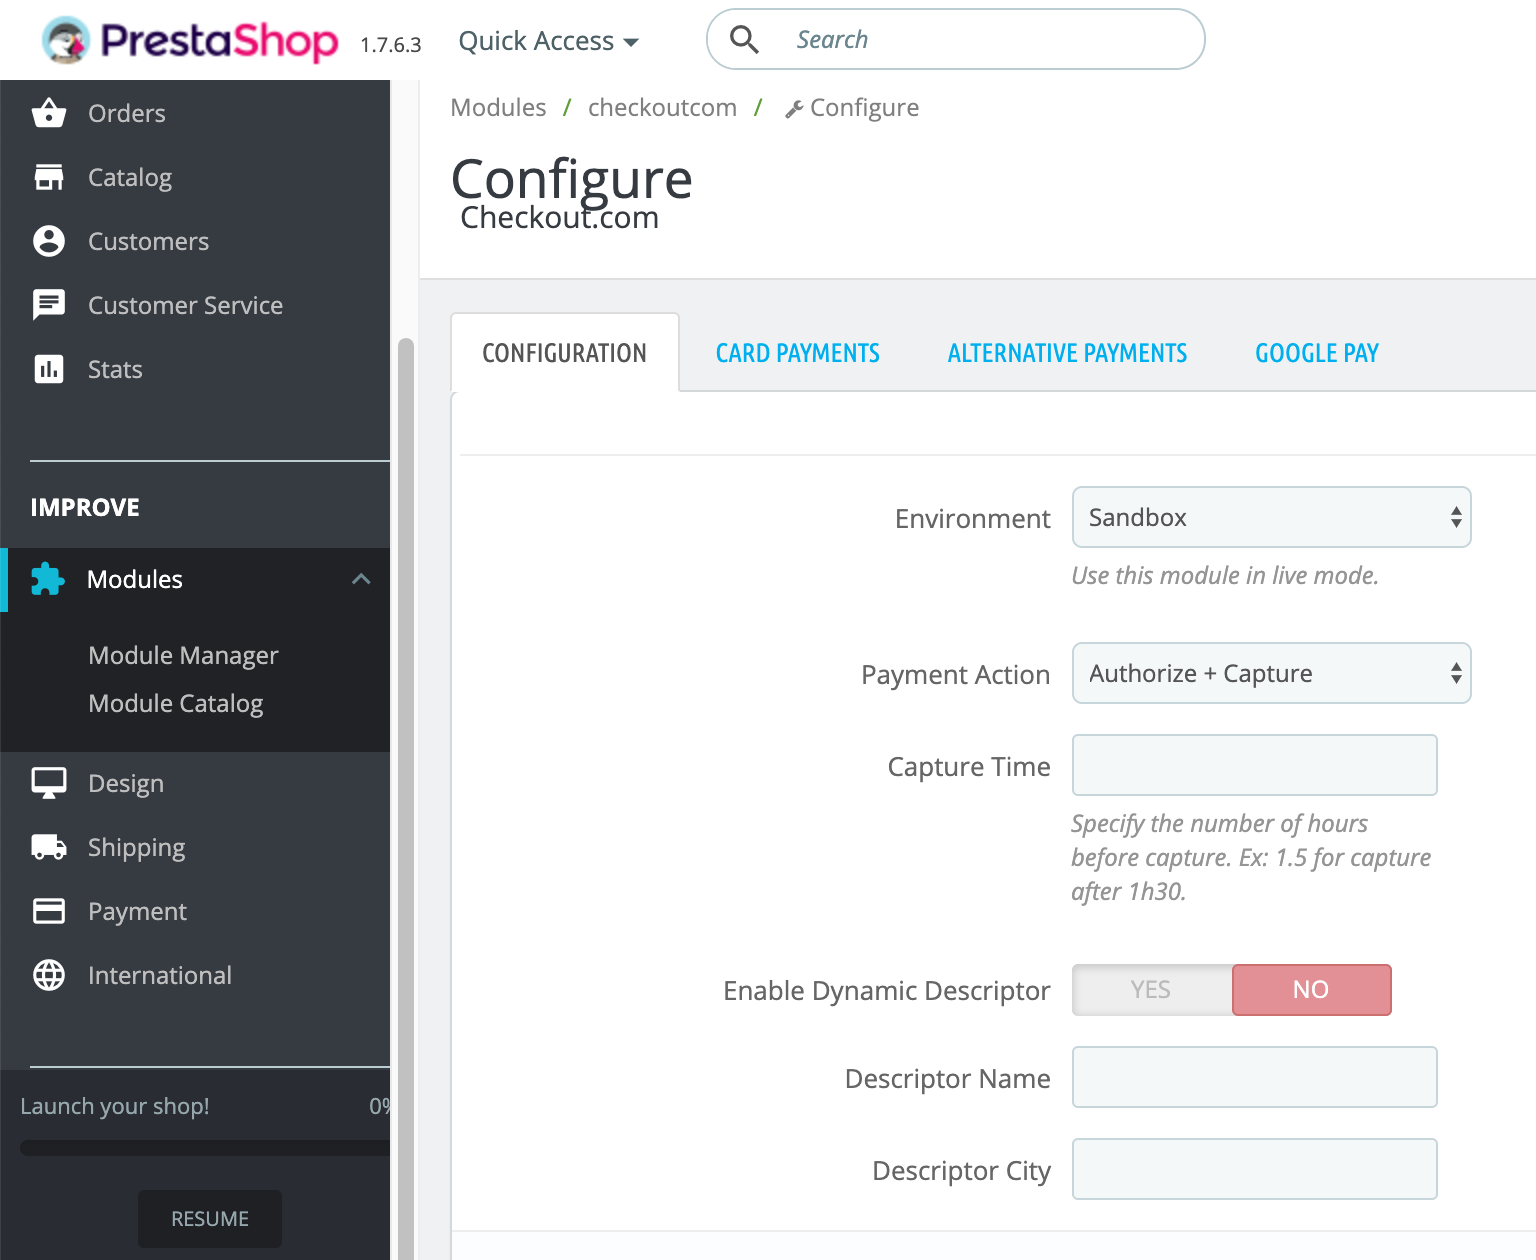
Next, select the Payment Action you want. Authorize + Capture means that the charge is authorized and captured (i.e., the money due from the customer's account is moved into your account) at the same time. Authorize will only authorize the charge; you have to manually capture the payment yourself. We recommend you choose Authorize + Capture.
Then scroll down and enter your Secret Key and Public Key. If you're testing, make sure you use the API keys from your sandbox Hub account.
- Click Save.
That's it! You're ready to start testing card payments.
Test your integration
- Go to your storefront and add a product to your cart.
- Go to your cart and proceed to the checkout.
Enter the required billing details. You can put anything here, though we recommend using a real email address so you can receive the order confirmation.
- Select the Pay by Card with Checkout.com method.
Enter the following card details:
- Number:
4242 4242 4242 4242 - Expiry date:
12/25 - CVV:
100
- Number:
Agree to the terms of service and click Order with an obligation to pay. You'll be redirected to an order confirmation page, and, if you entered a real email address in the billing details, you'll also receive an order confirmation email.
Log in to your PrestaShop admin dashboard, and go to Orders > Orders. Your test order will be displayed there with a
Payment acceptedstatus. (The transaction will also appear in the Payments section of your sandbox Hub account.) This indicates that the payment has been successfully captured.
You can now either go live as-is or extend your configuration.
Troubleshooting
If this test does not work, first check you have configured your webhooks correctly. For the plugin to work, they must be formatted correctly. If you have configured them properly, check your server; if it's password-protected or it restricts unfamiliar IP addresses, it may be blocking webhook notifications.
Further testing
You'll find more test cards and a range of scenarios to trigger in our testing guide.
Go live
If you're happy with the outcome of your testing and want to start taking payments right away, please contact our sales team in order to move to a live account.
Before you go live, remember to:
- Switch the environment to Live in the plugin's settings.
- Update your secret and public keys in the settings with the keys from your live Hub account.
- Configure the webhook URLs in your live Hub account.
Extend your configuration
You can extend your configuration to add more payment methods, use 3D Secure payments and more.
Can we help?
Thanks for using Checkout.com. If you need any help or support, then message our support team at [email protected].
Updated over 1 year ago