Salesforce Commerce Cloud installation
With our Salesforce Commerce Cloud installation, you can quickly start accepting payments on the Checkout.com payment gateway.
In order to use this extension, you need to be using Salesforce Commerce Cloud 16.2 or above.
Before you start
- Make sure you have your API keys ready. You can find these in the Hub.
- Find out your PCI compliance status. If you're unsure, you are probably not fully PCI compliant.
Step 1: Download the extension
Download the int_checkoutcom cartridge from the LINK Marketplace. You will be prompted to enter your Salesforce credentials.
Step 2: Upload the extension
Upload int_checkoutcom to your server, using a tool like UX Studio or Webdav. Apply the standard flow used to upload cartridges to your environment.
Step 3: Edit the cartridge path
- In the Business Manager, go to Administration > Sites > Manage Sites.
- In your target site’s settings, add
int_checkoutcomto the cartridge path like in the following example:

Step 4: Prepare the XML files
- Open a file browser (e.g. Windows Explorer) and locate the cartridge's
metadatafolder. - Step down the folder hierarchy until you are in the
sitessubfolder. - Rename the
SiteGenesisGlobalfolder to the name of the site for which you want to importint_checkoutcom’s settings, payment methods and services. - Navigate back to the project’s root folder and zip the metadata folder. Make sure to name the zip
metadata.zip.
Step 5: Import the XML files
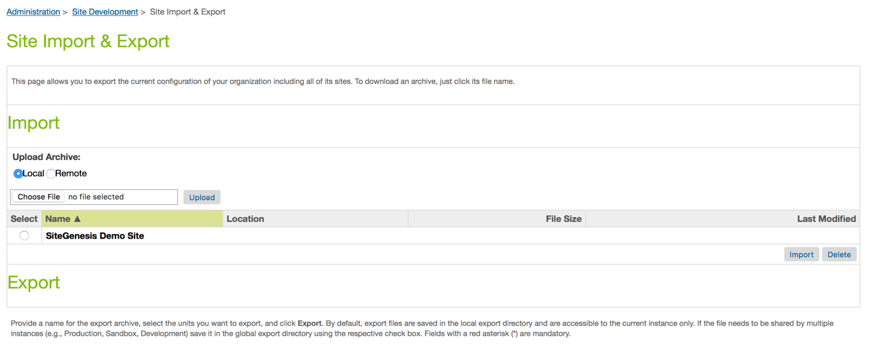
- In the Business Manager, go to Administration > Site Development > Site Import & Export.
- Under Upload Archive, select Local then click Browse.
- Select
metadata.zip, click Open and then Upload. Check the import status in the Status section. After the import has been completed successfully, all required Checkout.com data will be available globally and for the selected sites.

Step 6: Configure the cartridge
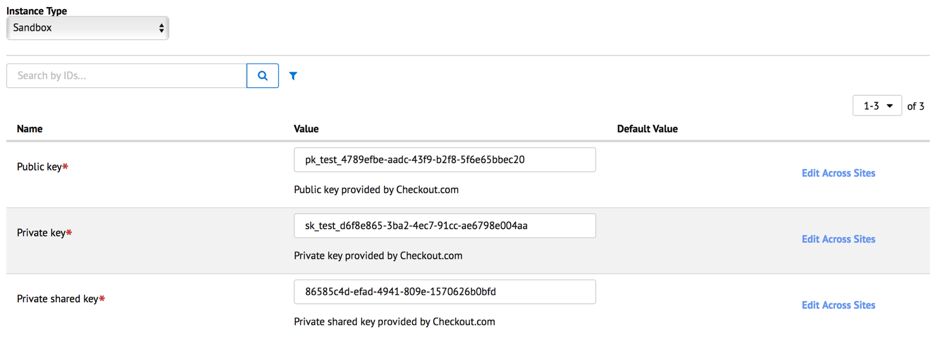
Go to Merchant Tools > Site Preferences > Custom Preferences. You will find two groups of configuration screens: Checkout.com Account and Checkout.com Global.
Checkout.com Account
On this screen, you will have to provide a public key, a private key, and a private shared key. These elements are necessary, regardless of whether you are in live mode or in test mode. You can find these in The Hub.

Checkout.com Global
This screen contains the other configuration parameters for your Checkout.com payment integration. The following parameters are mandatory and should be double-checked:
Parameter | Description |
|---|---|
Enable | Enables the Checkout.com credit card form. This credit card form is not compatible with the default Site Genesis credit card form. Please disable the default Site Genesis credit card form when enabling the Checkout.com credit card form. |
Storefront Core Folder | The name of the storefront core folder name. |
Storefront Controller Folder | The name of the storefront controller folder name. |
Enable debug mode | When the debug mode is enabled, the cartridge will log all gateway response in the log files of your website. |
3D Secure | Whether or not 3D Secure should be active. |
Attempt Non 3D Secure | In case of failure of a 3D Secure check, whether |
Auto capture | Whether or not the transaction should be captured immediately. |
Auto capture time | An integer or decimal number specifying how long after the authorization the transaction should be captured. |
Step 7: Edit the template file
You're almost done! In order to show the Checkout.com payment option on the billing page, you just need to edit the payment methods template.
You can find it in this folder:
/app_storefront_core/cartridge/templates/default/checkout/billing
Add the following code snippet to the paymentmethods.isml template file:
<iscomment>
  Checkout.com - Integration example
  Add this code to your paymentmethods.isml file
  --------------------------------------------------------------
</iscomment>
<isif condition="${(dw.system.Site.getCurrent().getCustomPreferenceValue("ckoEnabled"))}">
  <div class="payment-method <isif condition="${!empty(pdict.selectedPaymentID) && pdict.selectedPaymentID=='CHECKOUTCOM_CREDIT'}">payment-method-expanded</isif>" data-method="CHECKOUTCOM_CREDIT">
    <div class="form-row form-caption cko-form">
      <isinclude template="custom/credit/request/form" />
    </div>
  </div>
  <iselse>
  <iscomment>
    Site Genesis - Default Credit card block
    Add the default Site Genesis credit card form code here.
    --------------------------------------------------------------
  </iscomment>
</isif>
If your site is also using the default Site Genesis credit card form, please place the code of the form (found in the corepaymentmethods.ismltemplate file) after the<iselse>block in the snippet shown above.
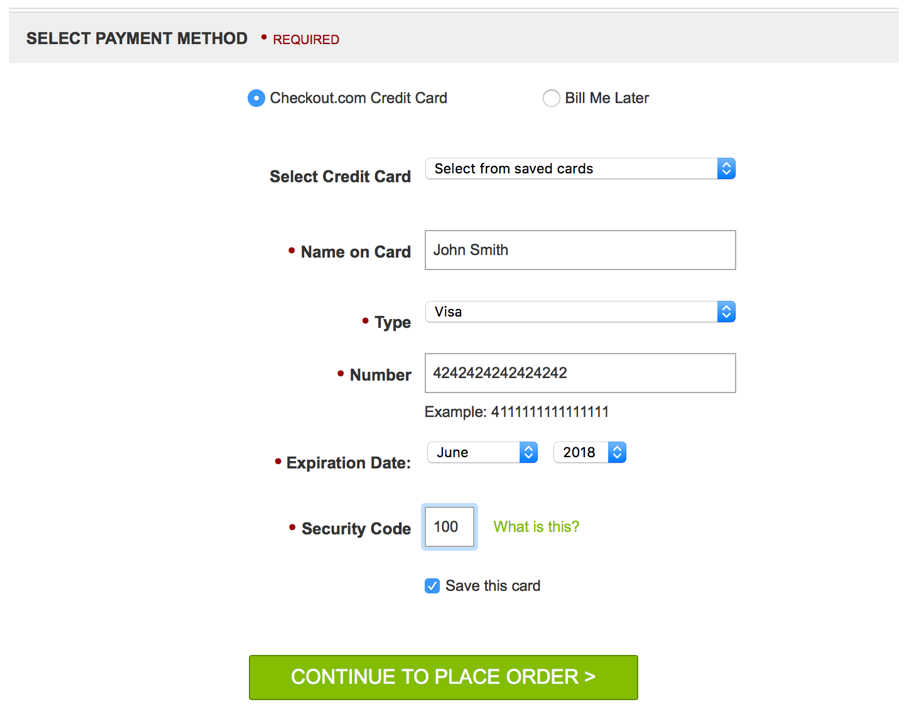
This will display the Checkout.com credit card form if enabled in the custom preferences, and display the default Site Genesis credit card form if not.

After having provided their card details, the customer can proceed to the order review page.
When they click Place Order, a charge request is sent to our payment processing server — without them being redirected.
If the payment is successful, the customer is redirected to the order confirmation page:

Can we help?
Thanks for using Checkout.com. If you need any help or support, then message our support team at [email protected].
Updated 8 months ago